Cat 6 Wiring Diagram: The Ultimate Guide for Network Installation
Before we delve into the world of Cat 6 wiring diagrams, it’s crucial to double-check if you really need Cat 6 wiring. While it offers superior performance, it might not be necessary for your specific needs. You might want to consider Cat 5 wiring, which is generally cheaper and sufficient for most home and small office networks. However, if you’re looking for higher data transfer rates or have high-bandwidth needs, Cat 6 is definitely the way to go.
This article aims to provide a comprehensive guide to Cat 6 wiring diagram, its importance in low wiring installations, and how to effectively use it for your network setup.
Cat 6 Wiring Diagram

Overview of a Typical Cat 6 Wiring Diagram
A typical Cat 6 wiring diagram includes a detailed representation of the cable’s internal structure, showing the arrangement of the four pairs of twisted wire.
Cat 6 wiring diagram A or B
The Cat6 wiring diagram can follow either the T568A or T568B standard. Both standards dictate the order in which the eight individual wires within the Cat 6 cable are arranged to form the RJ45 connector. The difference between the two is the position of the orange and green wire pairs.
Here’s a simple breakdown:
| Pin Number | Cat 6 A | Cat 6 B |
|---|---|---|
| 1 | White-Green | White-Orange |
| 2 | Green | Orange |
| 3 | White-Orange | White-Green |
| 4 | Blue | Blue |
| 5 | White-Blue | White-Blue |
| 6 | Orange | Green |
| 7 | White-Brown | White-Brown |
| 8 | Brown | Brown |
Both standards are perfectly acceptable, but it’s important to be consistent throughout your network. If you choose T568A for one end of the cable, the other end should also follow the T568A standard. The same goes for T568B. Mixing the two standards in a single cable can result in a “crossover” cable, which is used for specific networking scenarios.
Considerations for Labeling and Documenting the Wiring Diagram
Proper labeling and documentation of the wiring diagram are crucial for future troubleshooting and maintenance. Make sure to clearly label each cable and keep a record of the wiring layout.
Understanding Cat 6 Wiring
Overview of Cat6 Wiring Standards
Cat 6 wiring standards are designed to support frequencies up to 250 MHz and can deliver up to 10 Gbps over a limited distance of 55 meters. This makes Cat 6 more suitable for environments that require higher data transfer rates or have high-bandwidth needs.
Key Features and Benefits of Cat6 Wiring
Cat 6 wiring offers several advantages over its predecessors. It provides higher performance, better insulation against crosstalk, and is compatible with Cat 5 and Cat 5e wiring standards. Check our cable comparison article if you want to know more.
Tools and Materials Required
List of Necessary Tools for Cat 6 Wiring Installation
To install Cat 6 wiring, you’ll need a set of specific tools, including a wire cutter, RJ45 connectors, and a crimping tool.
Wire Cutter / Cable Stripper

This tool is used to cut the cable to the desired length and to strip the insulation from the ends of the wires before they are inserted into the RJ45 connectors. Some models are designed specifically for network cables and can strip the outer insulation without damaging the twisted pairs inside.
Crimping Tool

A crimping tool is used to secure the RJ45 connectors onto the ends of the cables. It does this by “crimping” or pressing the metal contacts inside the connector onto the wires, creating a secure electrical connection.
Punch Down Tool

If you’re installing wall outlets or patch panels, you’ll need a punch down tool. This tool is used to insert the individual wires into the slots on the keystone jacks or patch panels and trim off the excess wire.
Testing Tools
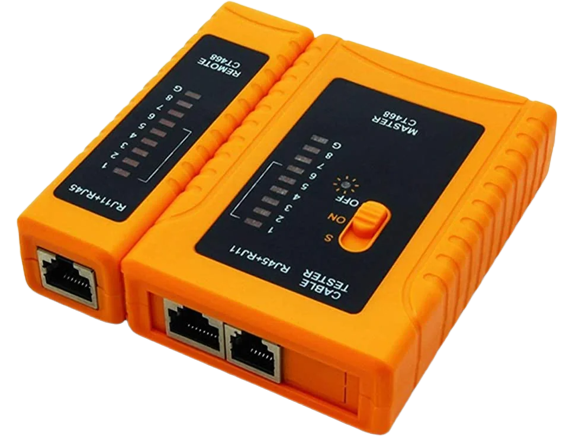
Finally, it’s important to have the necessary tools to test your network after installation. This includes a network cable tester to verify the correct wiring of the connectors and a network analyzer to measure the performance of the network.
Remember, while it might be tempting to save money by opting for lower-quality materials or cables, this can often lead to poorer network performance and more issues down the line. Investing in high-quality materials and cables from the start can save you time, money, and frustration in the long run.
Recommended Materials and Cables for Cat 6 Wiring
When it comes to setting up a Cat 6 network, the choice of materials and cables plays a significant role in the overall performance and reliability of the network. Here are some recommendations for materials and cables for Cat 6 wiring:
Cat 6 Cables
The most crucial component of your network setup is the Cat 6 cable itself. These cables are designed to support frequencies up to 250 MHz and provide performance up to 10 Gbps for up to 55 meters. They come in two types: unshielded twisted pair (UTP) and shielded twisted pair (STP). UTP cables are more common and less expensive, but STP cables offer better protection against electromagnetic interference.
When choosing Cat 6 cables, look for those that meet or exceed the TIA/EIA-568-C.2 standard. This ensures that the cables are designed and manufactured to meet the performance requirements for Cat 6 cabling.
RJ-45 Connectors
RJ-45 connectors are used to terminate the ends of the Cat 6 cables. These connectors should be specifically designed for Cat 6 cables, as they need to accommodate the thicker wire gauge of Cat 6 cables compared to Cat 5 or Cat 5e.
Patch Panels and Keystone Jacks
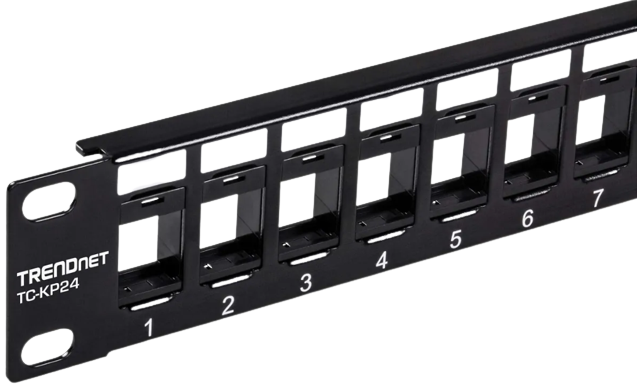
Patch panels and keystone jacks are used to connect the Cat 6 cables to the network devices. Patch panels are typically used in the network cabinet or server room, while keystone jacks are used at the wall outlets. Both should be rated for Cat 6 to ensure they can support the higher performance of Cat 6 cabling.
Cable Management Materials
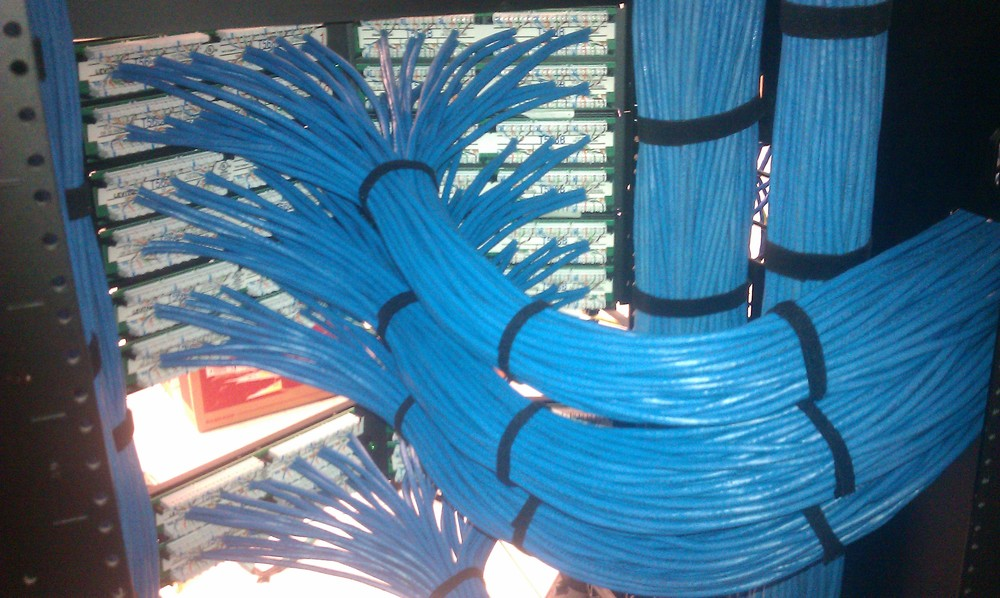
Proper cable management is crucial for maintaining the performance and longevity of your network. This includes cable ties or Velcro straps for bundling cables together, cable trays for routing cables along walls or ceilings, and cable labels for identifying individual cables.
Tips for Selecting High-Quality Cat 6 Cables

Choosing high-quality Cat 6 cables is crucial for ensuring the best performance and longevity of your network. Here are some tips to help you select the best Cat 6 cables for your needs:
Check the Specifications
Always check the specifications of the Cat 6 cables before purchasing. They should meet or exceed the TIA/EIA-568-C.2 standard, which ensures that the cables are designed and manufactured to meet the performance requirements for Cat 6 cabling.
Consider the Cable Type
Cat 6 cables come in two types: unshielded twisted pair (UTP) and shielded twisted pair (STP). UTP cables are more common and less expensive, but STP cables offer better protection against electromagnetic interference. The choice between UTP and STP depends on your specific needs and the environment in which the cables will be installed.
Look at the Cable Construction
High-quality Cat 6 cables typically have a separator (also known as a spline) that keeps the twisted pairs apart to reduce crosstalk. They also have thicker sheathing to protect against physical damage and interference.
Check the Wire Gauge
The wire gauge of Cat 6 cables is typically 23 AWG (American Wire Gauge), which is thicker than the 24 AWG commonly found in Cat 5e cables. A thicker wire gauge can help to improve the performance of the cable, especially over longer distances.
Choose the Right Length
The length of the cable is also important. Cat 6 cables can support speeds of up to 10 Gbps for distances up to 55 meters. However, for distances between 55 and 100 meters, the speed is reduced to 1 Gbps. Therefore, it’s important to choose a cable length that is appropriate for your needs to ensure the best performance.
Buy from Reputable Brands
Finally, it’s always a good idea to buy from reputable brands (like Cable Matters, Startech) that are known for their high-quality products. While these cables may be a bit more expensive, they are often more reliable and durable, which can save you time and money in the long run.
Planning the Cat 6 Wiring Installation
Assessing the Network Requirements and Layout
Before you start the installation, assess your network requirements and layout. This includes determining the number and location of data outlets, as well as designing the cable pathways and routes.
Installing Cat 6 Wiring
Preparing the Work Area and Tools
Before you start the installation, prepare your work area and tools. This includes ensuring that you have all the necessary tools and materials, and that your work area is clean and safe.
Techniques for Running and Securing Cat 6 Cables
Running and securing Cat 6 cables involves carefully routing the cables through the designated pathways, securing them with cable ties or clips, and avoiding sharp bends or twists that could damage the cables.
Terminating and Testing Cat 6 Connections
Terminating Cat 6 connections involves attaching RJ45 connectors to the ends of the cables, while testing involves checking each connection for proper functionality and signal strength.
Troubleshooting and Maintenance
Common Issues and Challenges with Cat 6 Wiring
Common issues with Cat 6 wiring include crosstalk, signal loss, and physical damage to the cables. These issues can often be resolved by checking the wiring diagram, re-terminating the connections, or replacing damaged cables.
Troubleshooting Steps for Identifying and Resolving Problems
Troubleshooting Cat 6 wiring involves identifying the problem, isolating the faulty component, and implementing the appropriate solution. This could involve re-terminating a connection, replacing a faulty cable, or adjusting the network configuration.
Best Practices for Maintaining Cat 6 Wiring Systems
Maintaining a Cat 6 wiring system involves regular inspections, keeping the cables clean and free from physical damage, and updating the system as necessary to meet changing network requirements.
Conclusion
Understanding and implementing a Cat 6 wiring diagram is crucial for any network installation that requires high data transfer rates or has high-bandwidth needs. With the right tools, materials, and knowledge, you can install and maintain a Cat 6 wiring system that meets your specific network requirements. Remember, the key to a successful network installation lies in careful planning, meticulous execution, and regular maintenance.